Behaviour & Training
How To Correctly Put A Slip Lead On A Dog (Left Side)
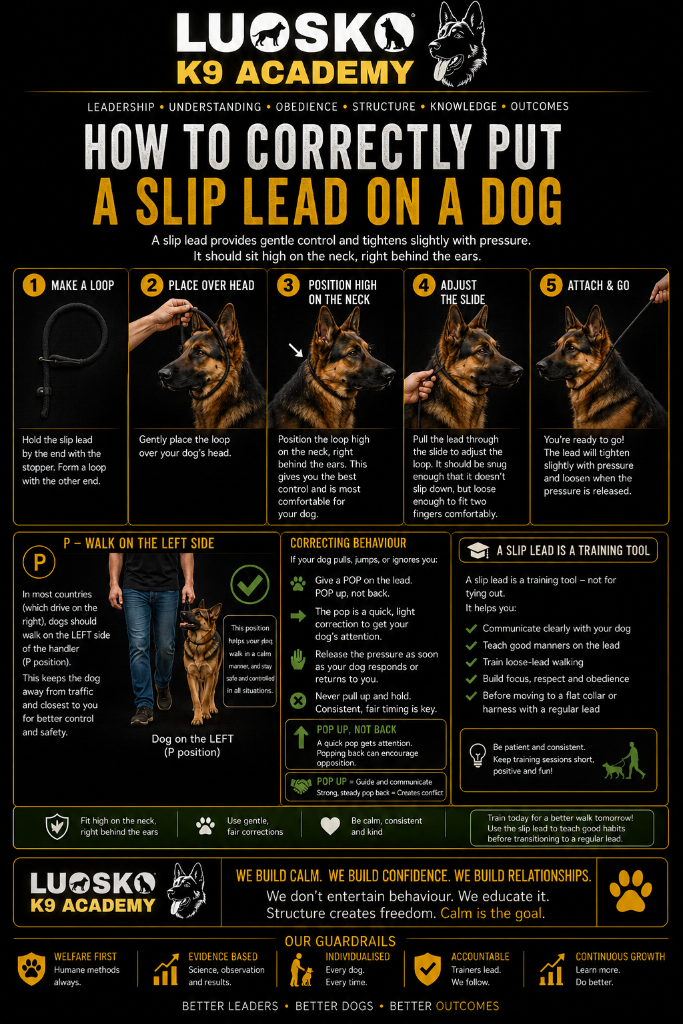
A slip lead provides gentle control and tightens slightly with pressure. It should sit high on the neck, right behind the ears.
Behaviour & Training
Registered Charity #1188407
Behaviour & Training
A slip lead provides gentle control and tightens slightly with pressure. It should sit high on the neck, right behind the ears.
Reader
HOW TO CORRECTLY PUT A SLIP LEAD ON A DOG
A slip lead provides gentle control and tightens slightly with pressure. It should sit high on the neck, right behind the ears.
P — WALK ON THE LEFT SIDE In most countries (which drive on the right), dogs should walk on the LEFT side of the handler (P position). This keeps the dog away from traffic and closest to you for better control and safety.
CORRECTING BEHAVIOUR If your dog pulls, jumps, or ignores you:
POP UP, NOT BACK — A quick pop gets attention. Popping back can encourage opposition. POP UP = GUIDE AND COMMUNICATE — Strong, steady pop back = Creates conflict.
A SLIP LEAD IS A TRAINING TOOL A slip lead is a training tool — not for tying out. It helps you:
Be patient and consistent. Keep training sessions short, positive and fun!
WE BUILD CALM. WE BUILD CONFIDENCE. WE BUILD RELATIONSHIPS. We don't entertain behaviour. We educate it. Structure creates freedom. Calm is the goal.
Behaviour & Training
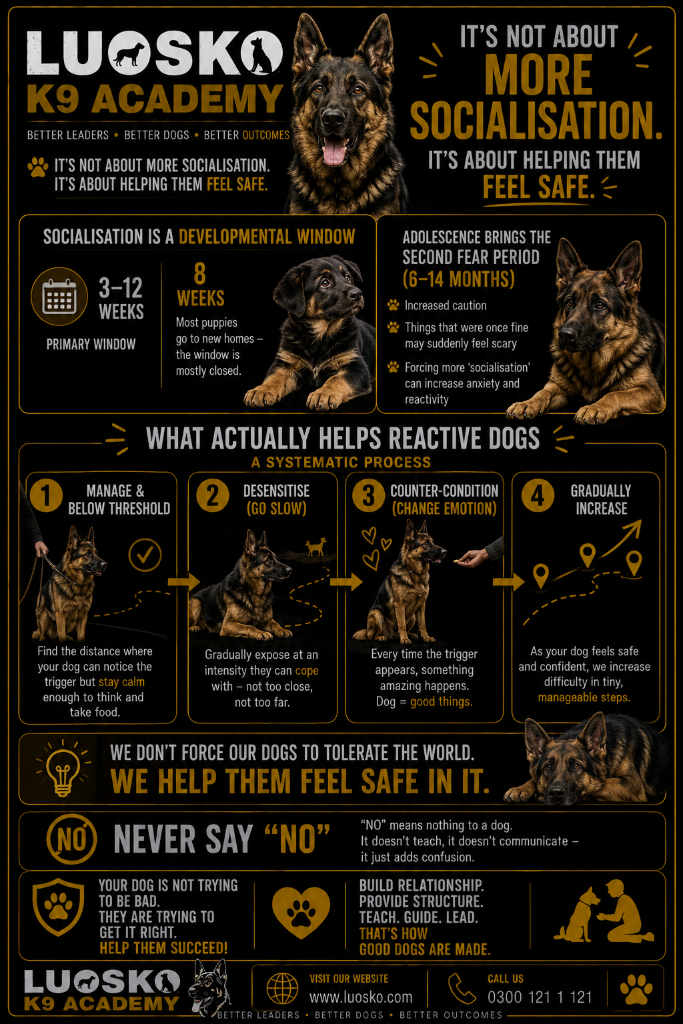
It's not about more socialisation — it's about helping your dog feel safe. A systematic process for reactive dogs.
5 minute read
View Guide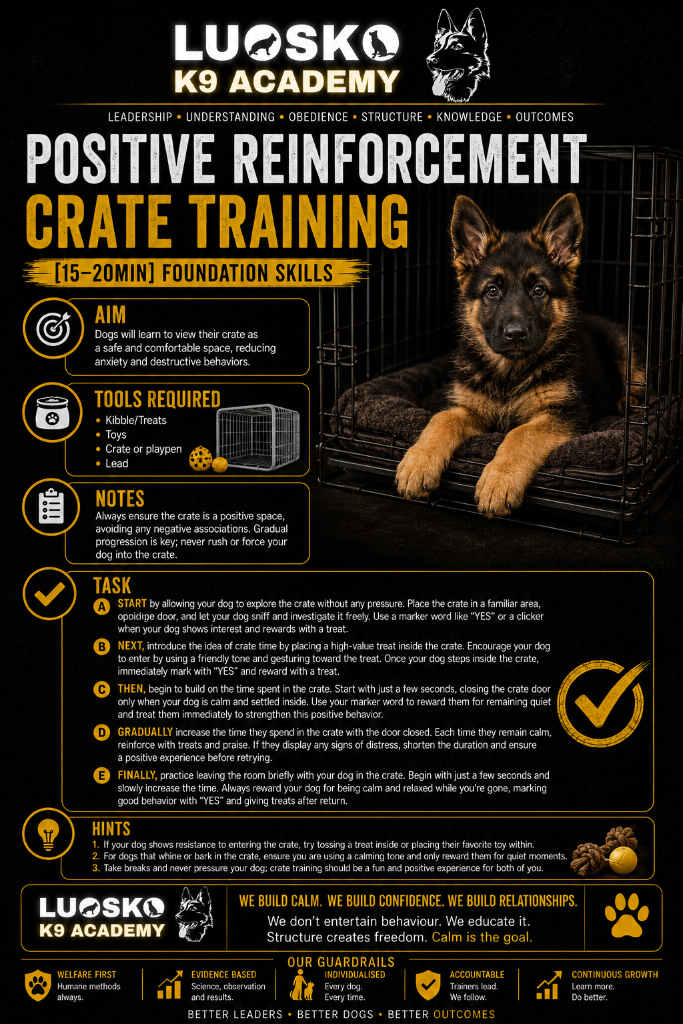
Behaviour & Training
A 15–20 minute foundation skills guide to teaching dogs to view their crate as a safe and comfortable space using positive reinforcement.
5 minute read
View Guide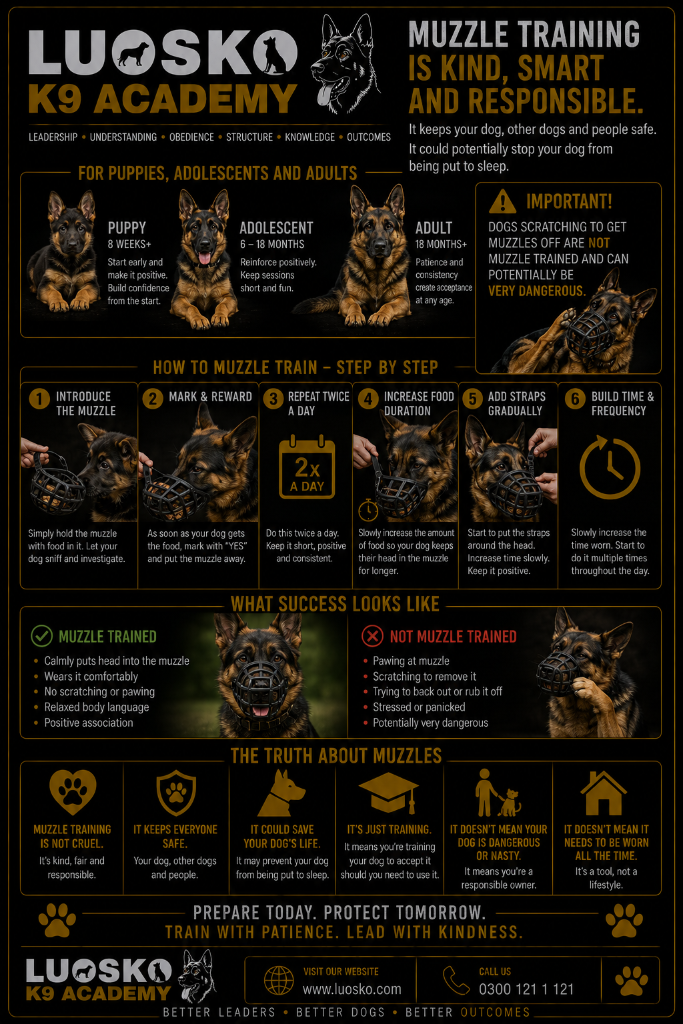
Behaviour & Training
Muzzle training is kind, smart and responsible. It keeps your dog, other dogs and people safe. It could potentially save your dog's life.
6 minute read
View GuideLUOSKO Guide
Behaviour & Training
A slip lead provides gentle control and tightens slightly with pressure. It should sit high on the neck, right behind the ears.
HOW TO CORRECTLY PUT A SLIP LEAD ON A DOG
A slip lead provides gentle control and tightens slightly with pressure. It should sit high on the neck, right behind the ears.
P — WALK ON THE LEFT SIDE In most countries (which drive on the right), dogs should walk on the LEFT side of the handler (P position). This keeps the dog away from traffic and closest to you for better control and safety.
CORRECTING BEHAVIOUR If your dog pulls, jumps, or ignores you:
POP UP, NOT BACK — A quick pop gets attention. Popping back can encourage opposition. POP UP = GUIDE AND COMMUNICATE — Strong, steady pop back = Creates conflict.
A SLIP LEAD IS A TRAINING TOOL A slip lead is a training tool — not for tying out. It helps you:
Be patient and consistent. Keep training sessions short, positive and fun!
WE BUILD CALM. WE BUILD CONFIDENCE. WE BUILD RELATIONSHIPS. We don't entertain behaviour. We educate it. Structure creates freedom. Calm is the goal.
We use strictly necessary storage to run this website. We only use analytics and donation tools if you allow us to. You can accept, reject, or choose — rejecting is as easy as accepting. Read the cookie information.